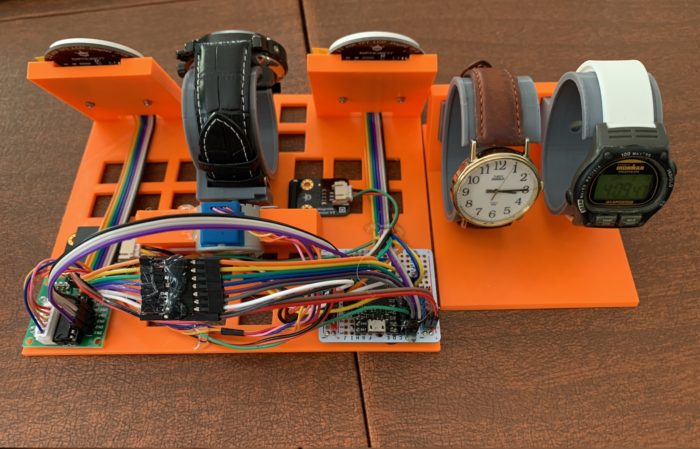
Some great projects are very personal. Or, at least, only the maker really understands the driving forces that led to the creation. And, yes, this is one of those.
Not sure when it happened, but the thought of measuring time in different ways got stuck in my head. Basically, there’s the old saying “Someone with one clock knows the time, someone with two is never sure.”
So I took that thought and figured all the ways I could show time in a compact construction, and it rolled on from there.
The parts
I had a few watches around. Two of them are the self-winding kind. And one was an old Timex digital watch. That got me going, so I thought I’d add an RTC that I had lying around and, since I had a WiFi capable board, I could do NTP. Then, along the way, I ended up with a straight analog digital watch (that one has a special story, too).
The RTC and NTP needed screens to display, so I got these cool round TFT displays that the vendor had a library for drawing a rudimentary watch face.
For the self-winding watch, I went out and bought an inexpensive one that looked cool (has year, month, day, day of week). And to keep the self-winding going, I hat to add a motor. I first thought I could get away with a servo, but soon thought better and got me a stepper.
At the core of it, I put my TinyPICO that was lying around for a while. I adore it, but really haven’t had a project that needed it since after some stuff I did I first bought it (that’s another project story).
When I put it all together the TFT were using 7 pins (SPI), the stepper took 4, and the RTC 2. That left one more for the magnet sensor for homing the stepper. Yes, I ended up using all the logic pins of the board. Also, everything ran on 3.3V, except the stepper, which ran off 5V.
Two hearts
The TFT drawing was really slow. I could draw a face a second, but it took most of the second for both faces to render. That meant that the stepper wasn’t happy when it was going. I could have left it at that as the stepper would only be going every so often (to keep the watch wound). But the cool thing is that the TinyPICO is based on an ESP32-PICO which has two cores.
The Arduino IDE only uses one core. But there is a way to make a process work on the second core. And it was soooo easy. So I ended up putting the screen drawing on one core and the stepper on the other. And the two could merrily chug along without any conflicts.
Leveled up there, for sure. Haha.
Mounting it all
The coding part was quite easy, and simple. The mounting of it all was a bit more invovled.
This was the first project that I printed a base and an enclosure of my design. I needed a useful base on which to mount things and an enclosure to cover it all. I kept things simple. This was the biggest effort I’ve ever done in Fusion 360 (best way to learn it properly). And these were the longest and biggest prints I’ve done to date. There were hiccups along the way, of course (I’m not going there). But here’s the inside (to right).
Feeling unfinished
OK, so I flexed my Fusion 360 skillz, used all the pins, and ran things on two cores. Really level up my skills. And I did manage to get it all up and going. But I forgot to make the enclosure snap or screw together so it’s still a bit loose. And I’m not sure if the homing code is working as it should. But chiefly, the holder for the self-winding watch is unsatisfying – it’s loose, mostly.
But I really need to put this project down. I haven’t been able, tho, to set it up and let it run. the whole point of the project is to turn it on, let it go for more than a few days, and watch how all the time elements get out of synch (as in, fall behind in their own way).
Life has a way, and I can’t focus on this much more for a few months, so in the semi-finished state it’ll stay until then.
Oh, well.
[This is meant to be the Dec-Jan edition of my project challenge. Talk about stretching out the time frame. Since Oct, this has been the norm. Currently, things are a bit more challenging than usual.]
