I’ve had an idea bouncing around my head for years.
In a conversation with Dan Alroy, I forget what we were talking about, he mentioned a God Box. Basically, as I understood, it’s a box you put in written snippets of, say, a prayer or a petition; a quiet place to put prayers, wishes, and intentions, to let them go. With my hardware mentality growing and thinking of sublime artifacts, tangible experiences that connect one to the sublime, I started imagining something you talk into that somehow captures your prayer in a digital format for – I didn’t know what.
In any case, I had a line in my notes to keep thinking about what a God Box meant to me.
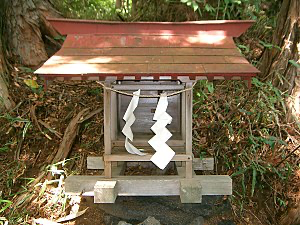
Shide and prayer flags
I had recalled that at Shito shrines, there are zigzag strips of white paper, called Shide, that are folded and hung in various ways. I erroneously remembered them as having prayers written on them then blowing in the wind. But they do not have anything written on them. The process of folding and their rustling is what provides the spiritual effect.
There are Tibetan prayer flags which, as I understand, have sutras or prayers or mantras written on them. They come in different colors and are hung to blow in the wind. The wind is what carries the prayers to the greater world (not to the gods).

I wanted to do something similar, where you record a prayer and it is converted into something you could hang and let the wind carry off what what was recorded.
The God Box is sorta that.
The build
At first, I wanted to do something simple. Most folks turn to a Raspberry Pi, as it is quite capable for sound and stuff. [I have a related project that does use one, so watch this space for when that one is done.] But I tend to prefer to do everything with microcontrollers. And for what I was doing, a microcontroller would be more than enough. [Working on the related project I mentioned, I had investigated also the ISD1800 and ISD1700 family of sound chips – just to make it harder, haha.]
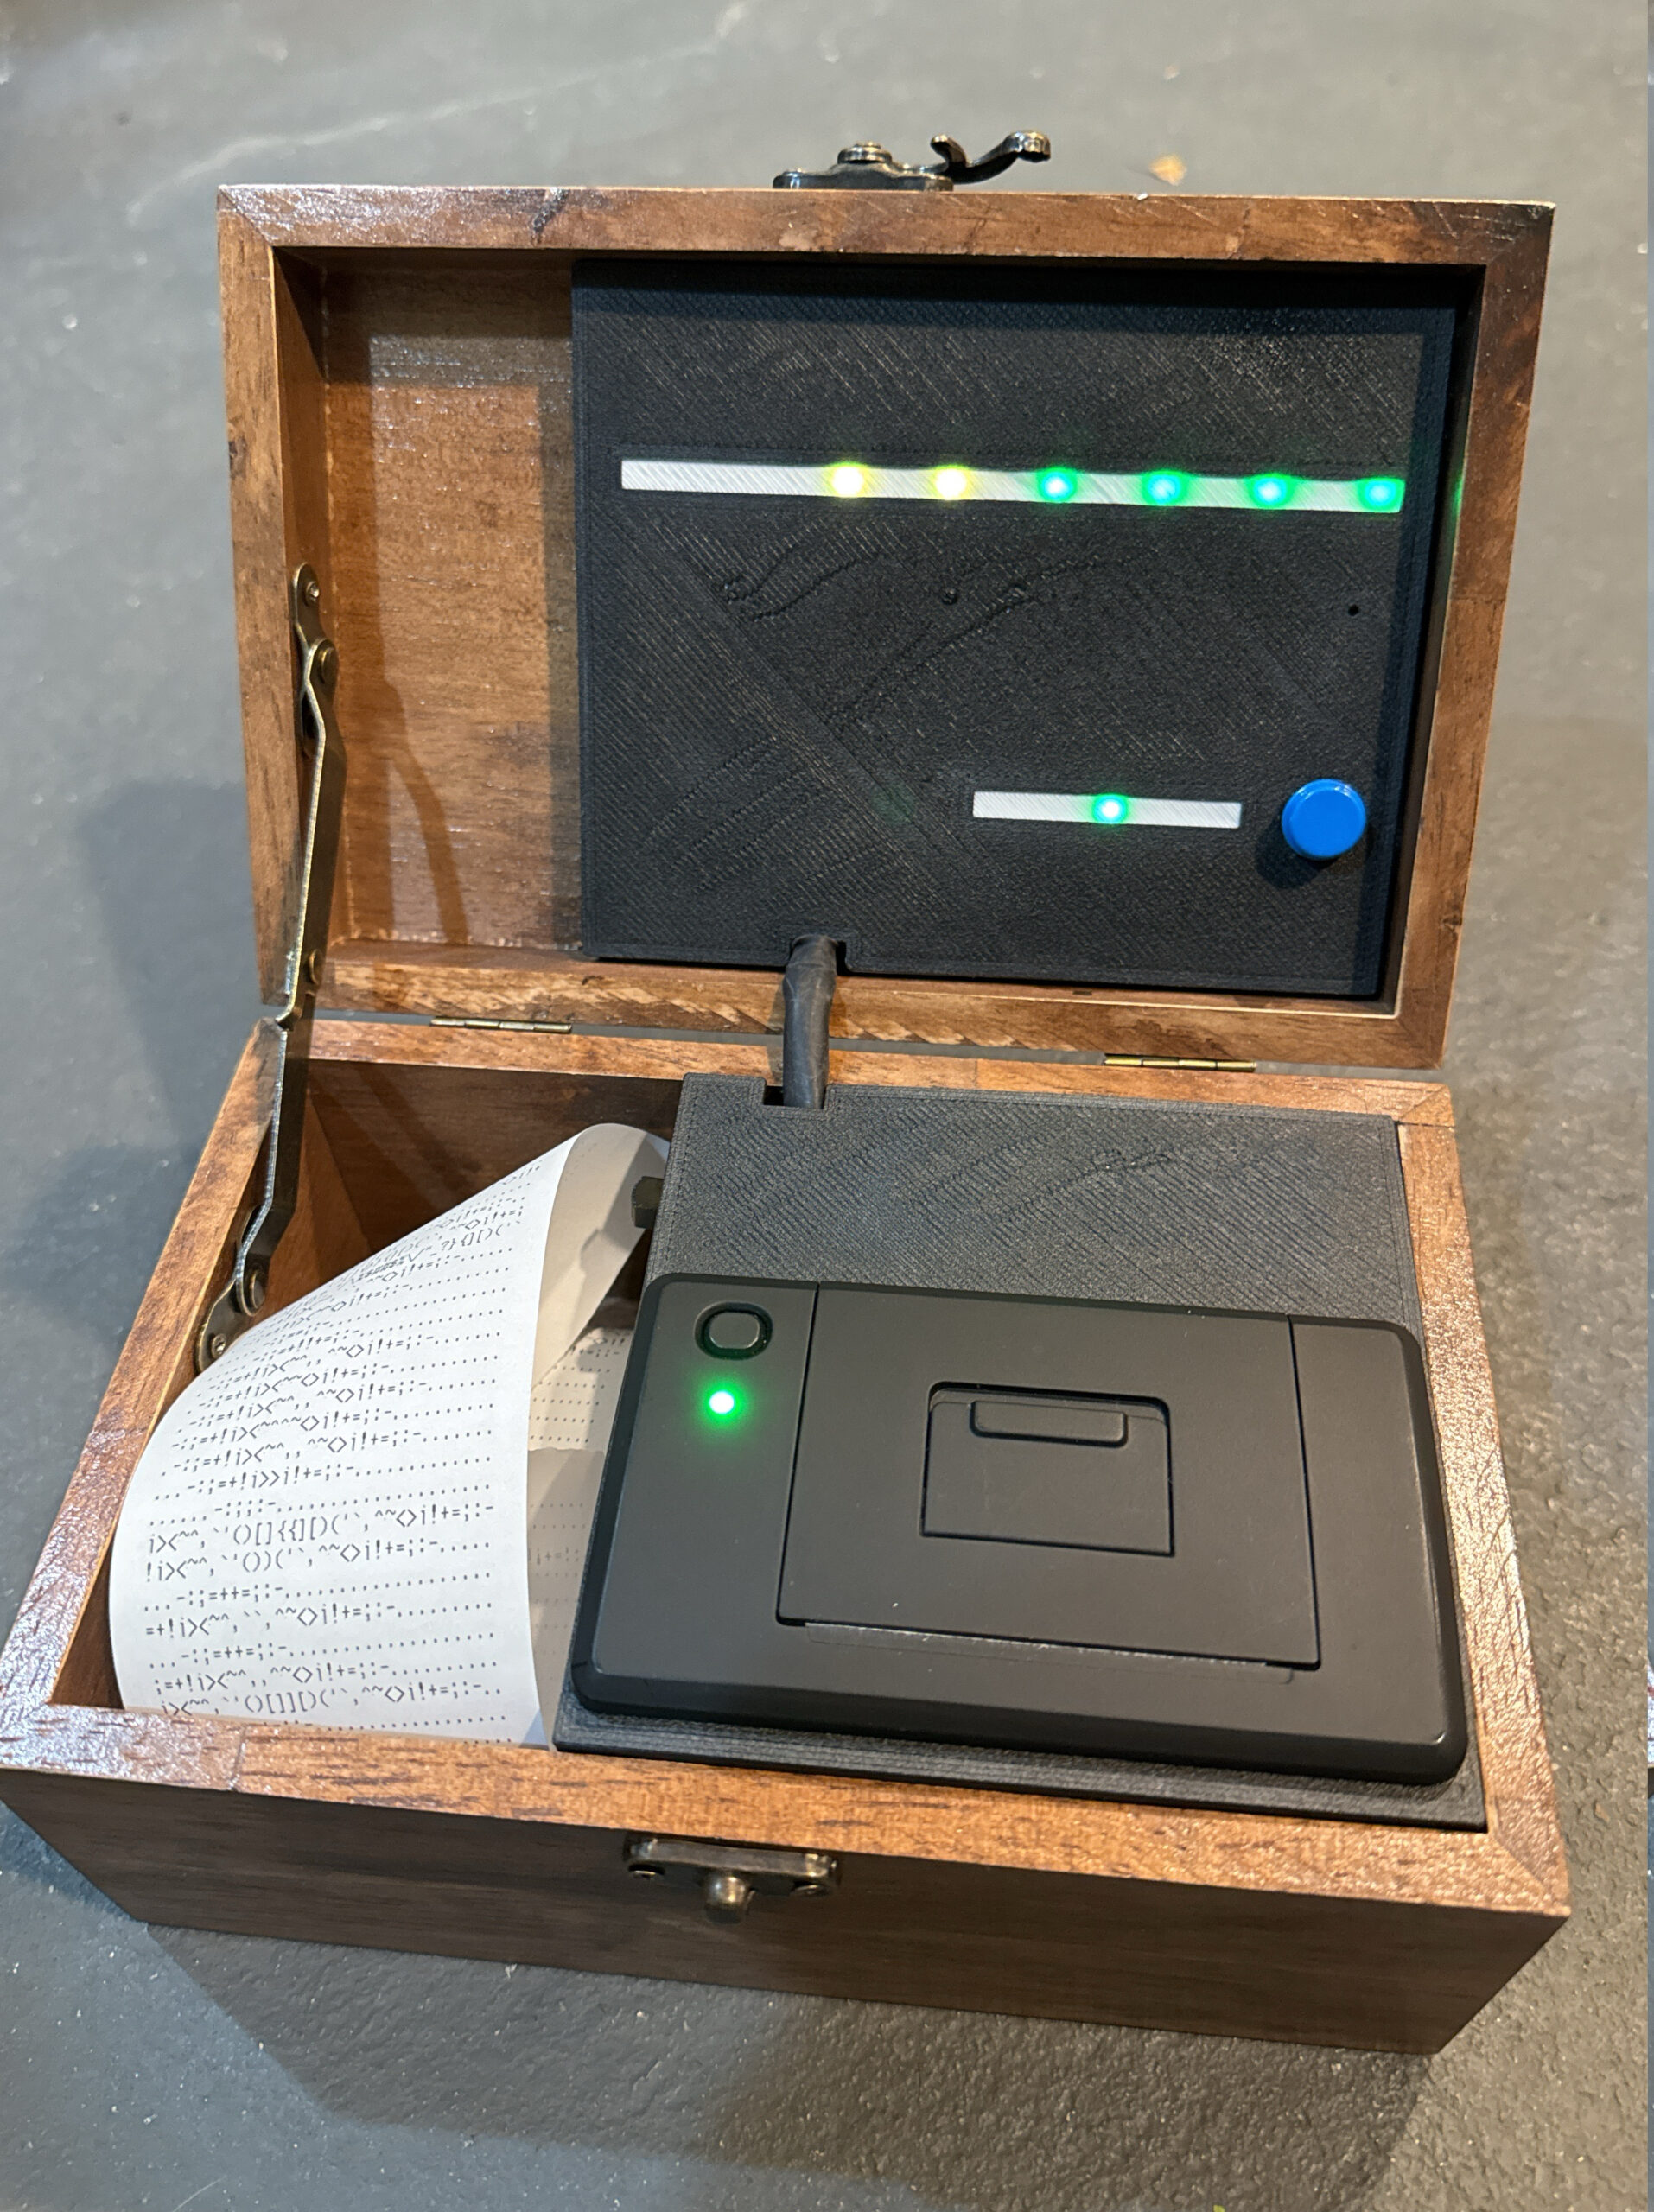
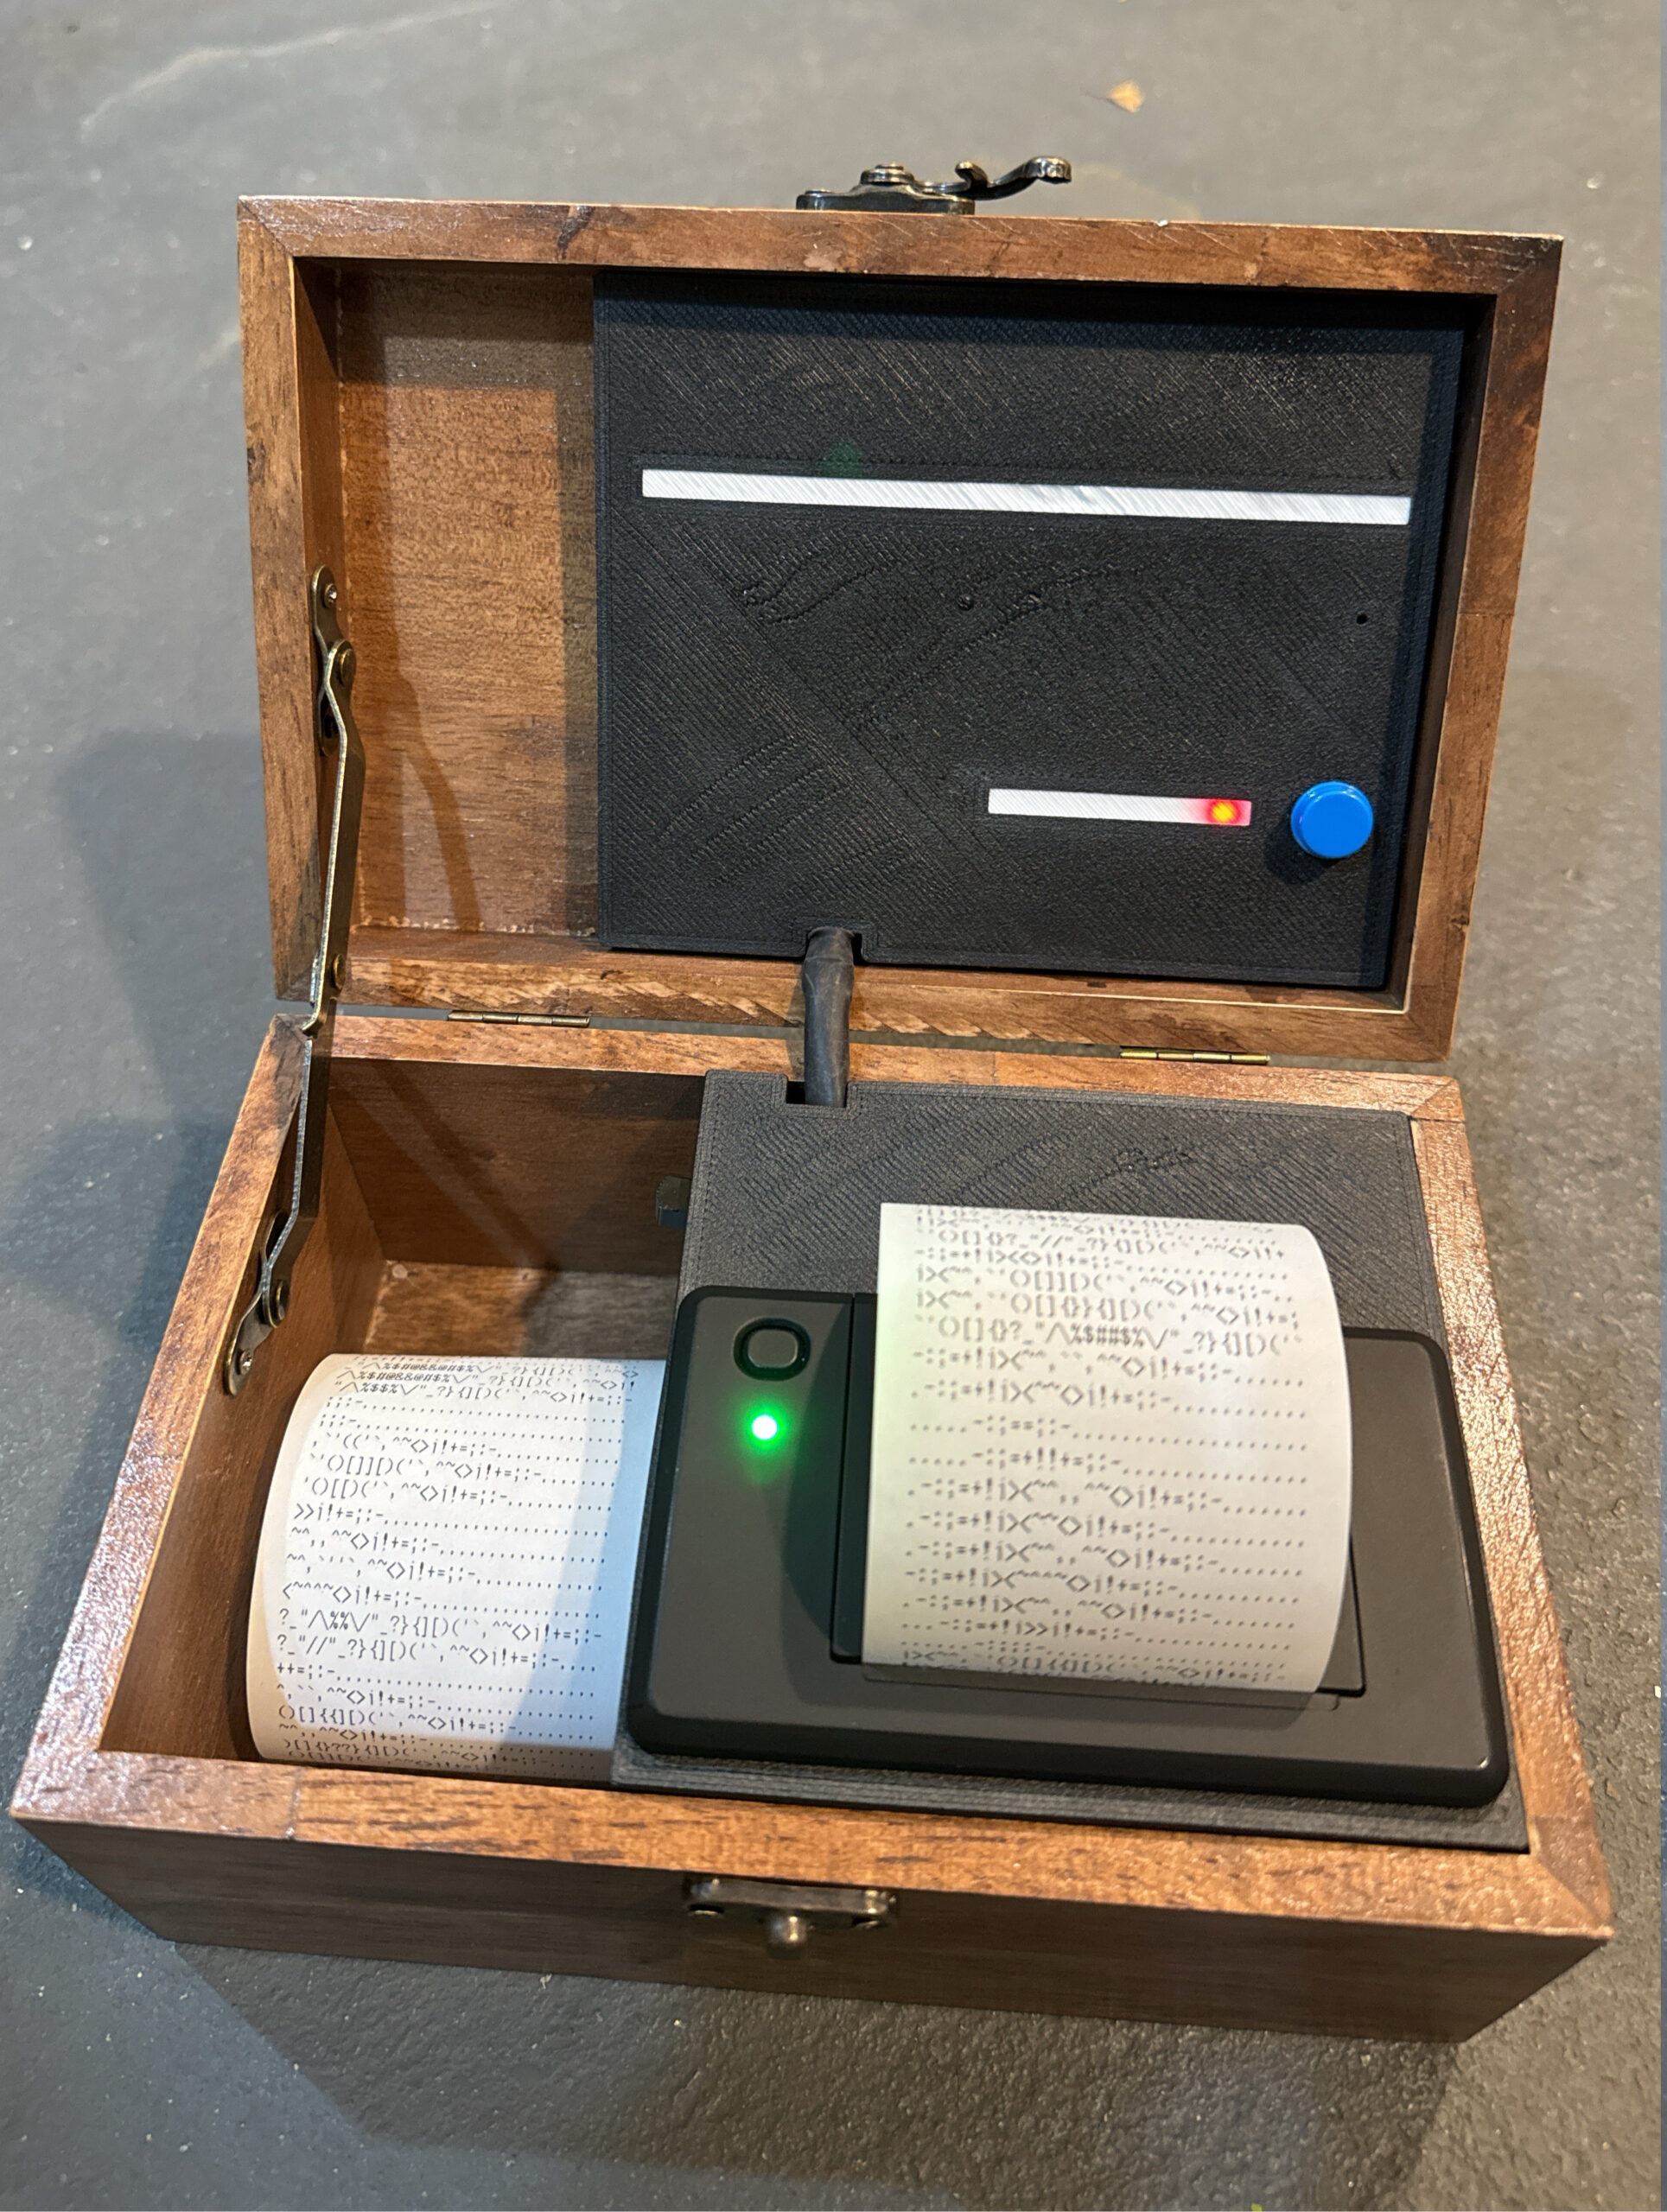
In the end, as I wanted to use CircuitPython, the core microcontroller I chose was the Raspberry Pi Pico. The output is a thermal printer. I use an Adafruit PDM mic for input. There are simple visuals of two Neopixel strips – one for the three menu lights, and one for the eight-pixel VU meter, and a button for working the interface. I found a nifty 5V/4A battery* to run the whole thing, and I cannibalized an old hair clipper for a chunky and useful switch.
Since this is meant to be a god box, I found a nice box at Hobby Lobby (don’t judge – I happened to be there with my mother) to which I added a hinge (intentionally letting the lid lean back a bit) and latch.
Everything was packed into an enclosure in the bottom and under the cover.
How it works
I had written a lot of the code myself (Adafruit had some nice tutorials to riff off of). And then when I started using ChatGPT (Geoffrey) I was able to clean up my code. The project sat for many months and when I got back to it, I was already using Claude. With Claude we took the code to the next level.
The flow goes as such: You click to the record menu. The VU meter shows you your sound levels, so you can get a feel for how loud to speak.** Then you long-press into record mode and you record for 7 seconds. After recording, you click over to the print menu. Then you long-press to print out the strip.
So far, so good.
The twist
The main twist is that what comes out on the strip is based on the recording, but encoded in a visually interesting way. You can then store it in the god box or hang it, but only you and your higher power know what is encoded on that strip.
At first, I just plotted out the levels in a simple volume graph. I did use a list of characters by density, so that higher levels had different (higher density) characters than lower levels.
But I found that plain graph to be way too boring. So Claude and I started brainstorming other patterns. I wanted something more ASCII-art like, which is why I had the string of characters based on density in the first place.
So what I did was add some dimensions to the original line plot.
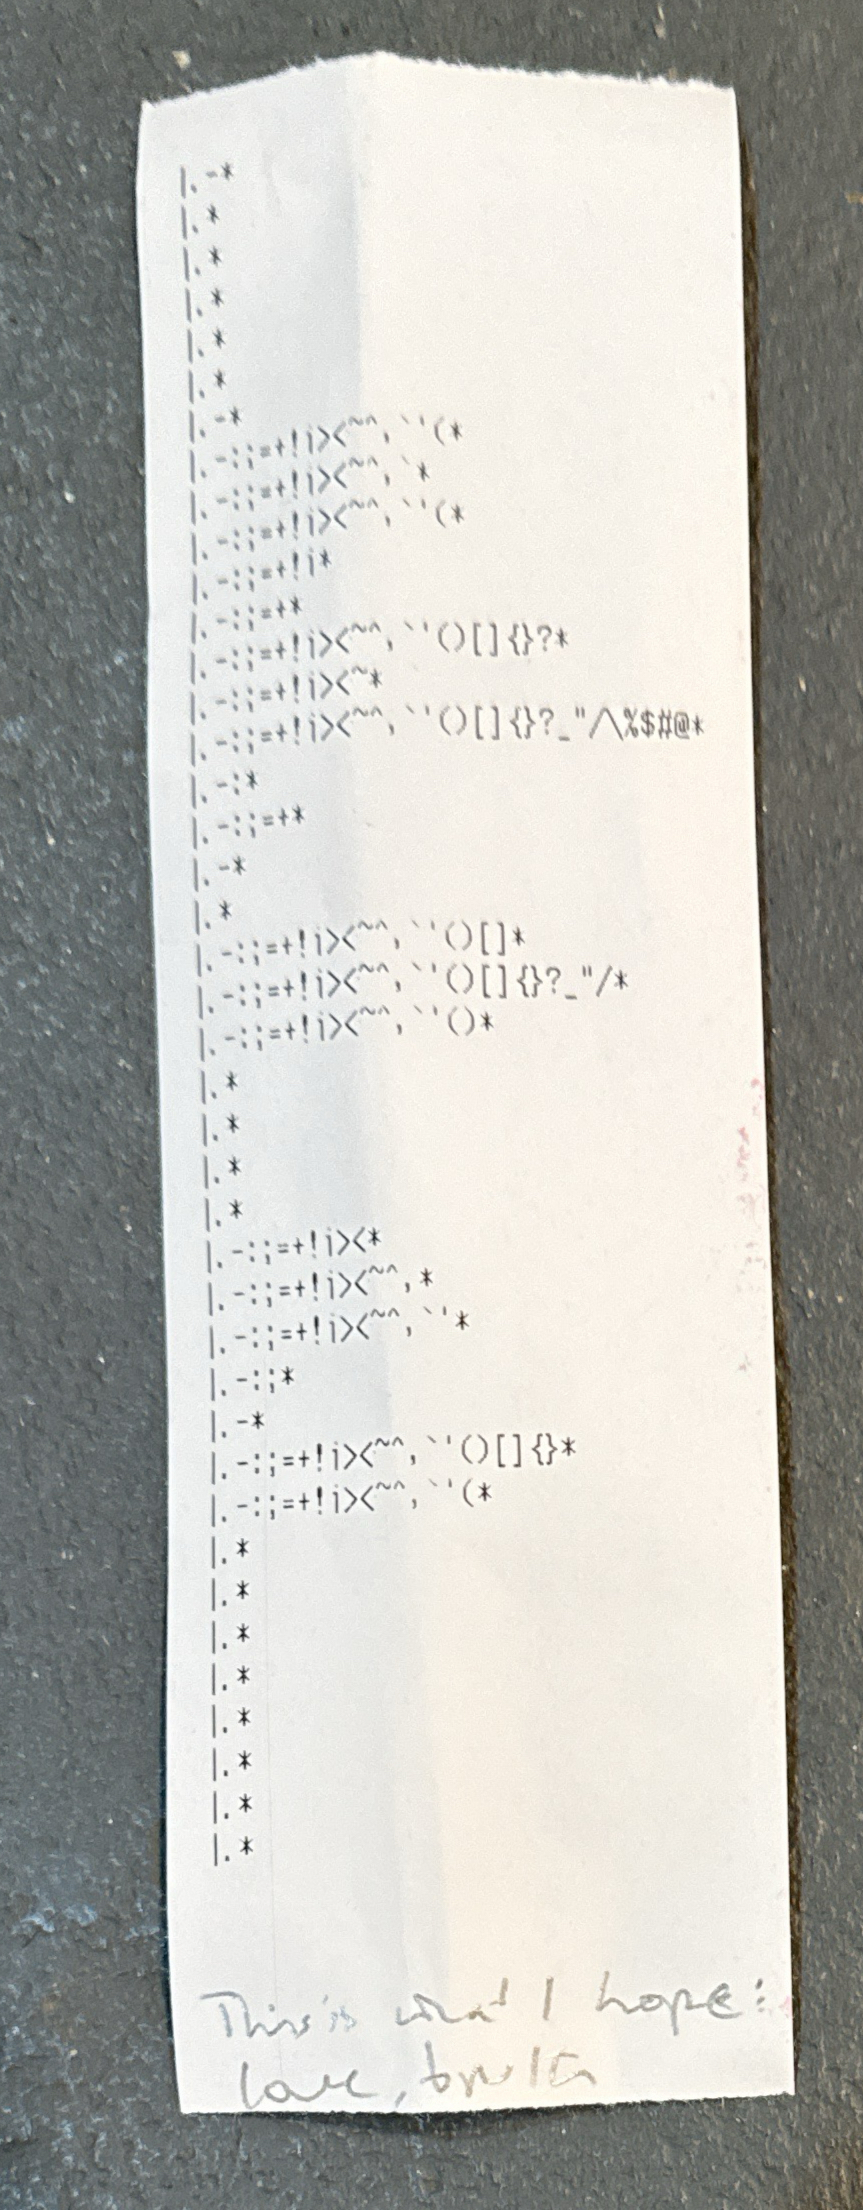
What I came up with, and Claude helped code, was a strip full of characters with an interesting pattern. The ‘peak’ of each row is informed by the volume levels recorded. And the characters to left and right roll down the density to sort of form a hill.
And, rather than just have that, I have the peak shift slightly left or right based on the direction and magnitude change from row to row. This gives it a wavy side to side, an organic, flowing effect.
Lastly, as I always like randomness, each time we print, we start the first row peak in a random spot (randomness ensured by getting a value from a floating pin – a usual practice of mine). That means no two prints will be the same.
But you and your higher power will know what the abstract ASCII pattern represents.
Left in a gallery below is an early print, showing the line plot. The image to the right below is an evolution of the line plot into the multi-dimensional plot.

Sublime artifacts
I’ve been noodling for some time how tangible objects can connect us to the sublime. So I’ve been returning to the idea of electronics making that bridge between internal to external, tangible to intangible. I’ve been toying with this for a few years now, having built a few things I sometimes call spiritual hardware or tangible experiences.
Mixing of spiritual and hardware is nothing new. A rosary or prayer beads are good examples. And such bridging is usually related to the twists I put in the projects I make. I also enjoy seeing other folks do interesting things mixing up the spiritual and the tangible (i_mozy, I’m looking at you).
What do you think of my God Box? Do you know of examples of folks mixing the spiritual with electronics? Let me know.
*There was a panicky moment with the power. I tried to power everything from a run-of-the-mill USB battery pack. But the amperage of the whole set up wasn’t enough to keep it on (or at least seemed that way in early tests). I decided to get a bare battery, but the specs called out a low amperage cut out. So I spent some time building a stay-alive circuit, based on something I read online. But, fortunately, in the end, my whole setup as is was enough to keep the new battery alive. Also, I am glad I was pushed to get a proper battery. Most USB battery packs are 2A. This one I got was 4A and even better to power the printer (min 2A).
** The sorta interaction distance I measured when sitting in front of the box is about 12-14″. Depending on the ambient noise, the mix still requires some normal voice level to be heard. I wondered if I should make it more sensitive so that one could whisper, thinking that if I were recording prayers, I would do it in a quiet, soft voice, maybe a whisper. But then I realized, moving in to whisper is an even cooler effect, guiding that intimacy, leaning in as if to whisper a secret. [As Claude said when I shared this insight: “It’s a beautiful intersection of technical constraints and human behavior creating an unexpectedly meaningful interaction pattern.”]